Skip to content
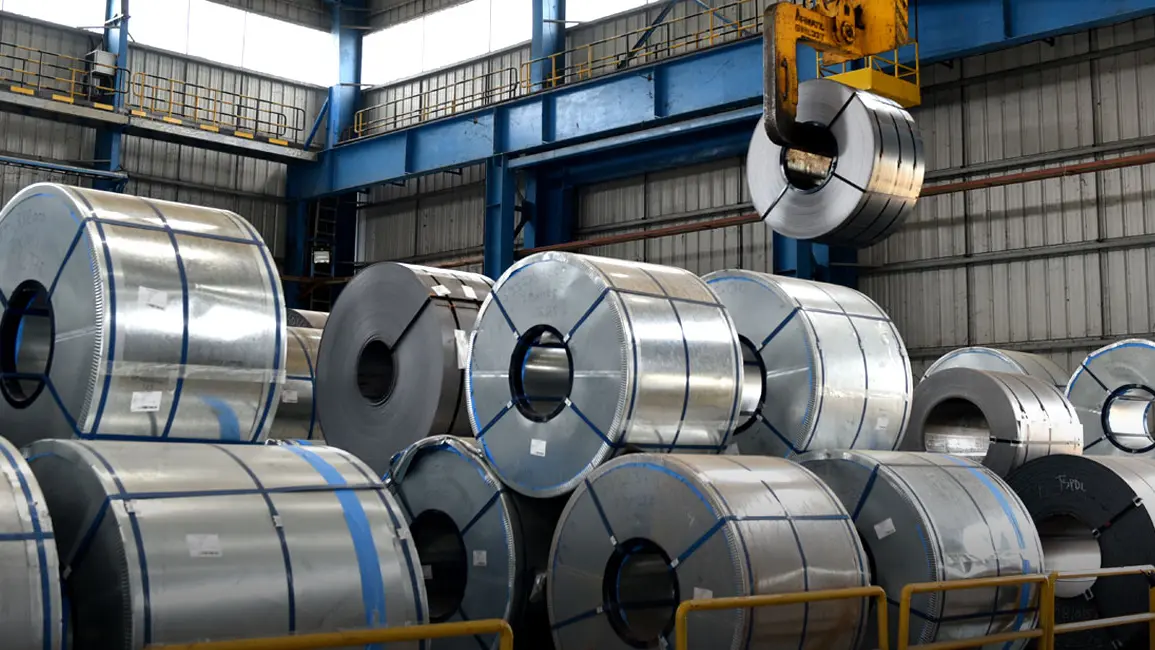
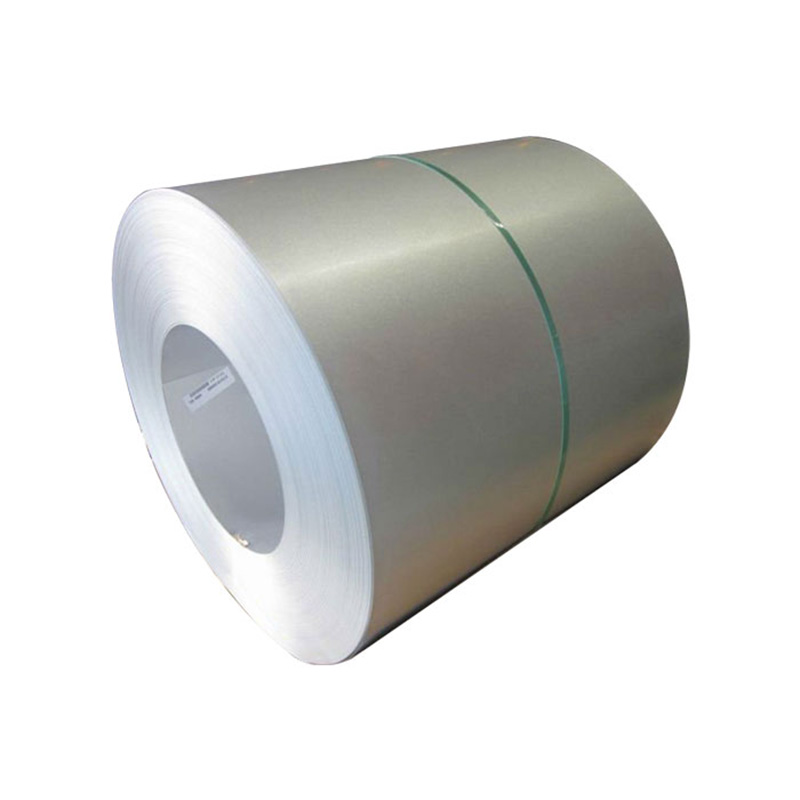
To inspect galvanized steel coils for quality issues, follow these steps. You start by looking for visible defects or irregularities. You then perform physical tests such as measuring coating thickness and checking the galvanized layer for uniformity. Advanced inspection methods help you detect hidden flaws. You identify common defects to ensure the coil meets standards. A systematic approach improves your inspection results and helps you maintain coil quality.
| Inspection Step | Description |
|---|---|
| Appearance Inspection | Visual checks for any surface defects or irregularities. |
| Thickness Measurement | Measuring the coating thickness to ensure it meets specifications. |
| Galvanized Layer Quality Inspection | Assessing the quality of the galvanized layer for adherence and uniformity. |
Each section will guide you through practical steps you can use to Check Steel Coil for quality.
Key Takeaways
- Start inspections with a visual check for surface defects like scratches, dents, and discoloration.
- Measure the coating thickness to ensure it meets industry standards for corrosion protection.
- Check the galvanized layer for uniformity and adhesion to prevent peeling or flaking.
- Inspect coil edges for sharpness and roughness to avoid safety hazards and processing issues.
- Perform physical tests like bend tests to assess the flexibility and durability of the zinc coating.
- Use advanced methods like ultrasonic testing to detect hidden defects that may compromise quality.
- Document all findings meticulously to track quality trends and communicate effectively with suppliers.
- Follow a consistent inspection process to maintain high standards and reduce the risk of overlooking defects.
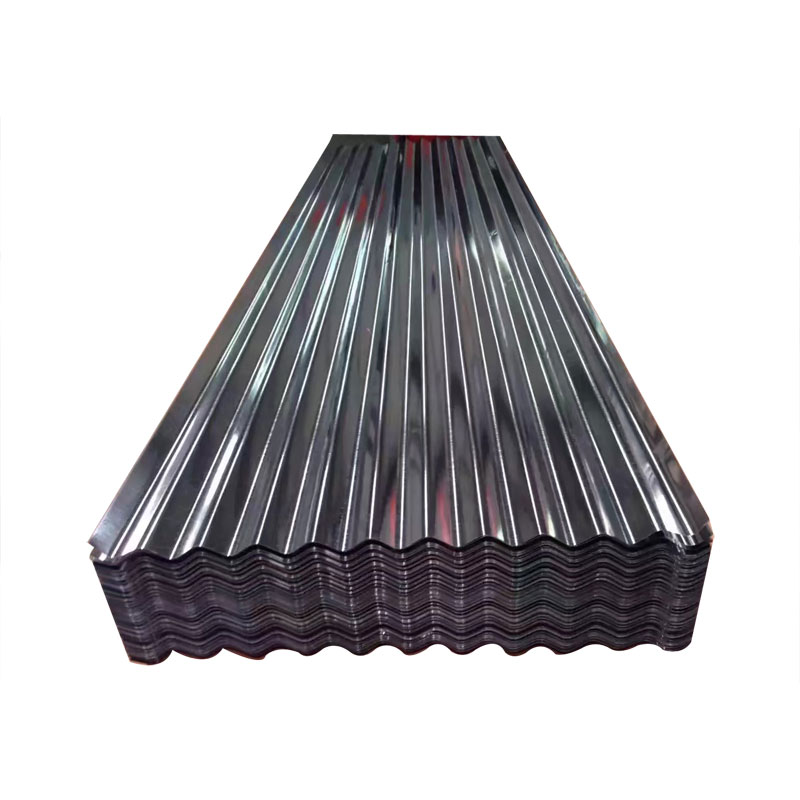
Visual Inspection for Steel Coil Quality
Surface Color and Luster
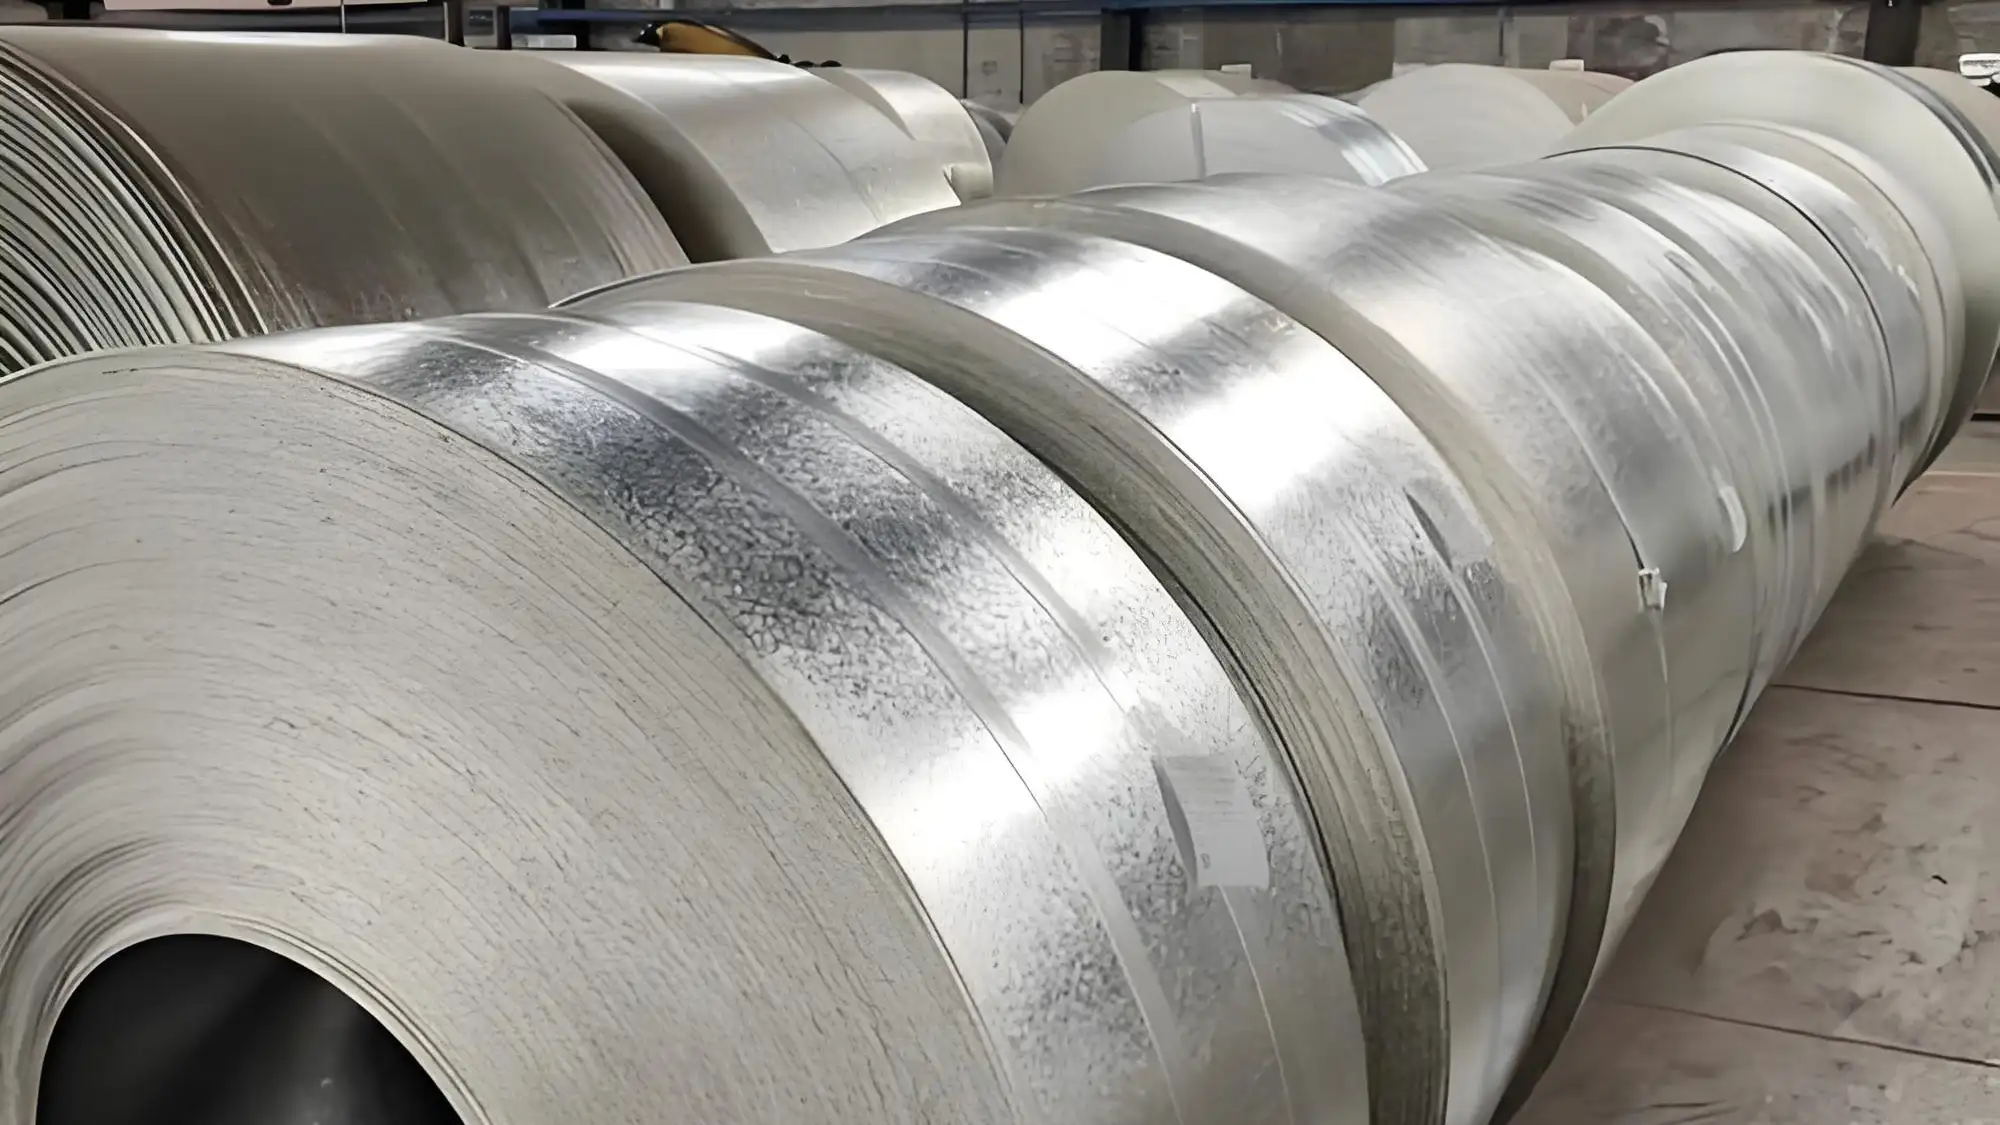
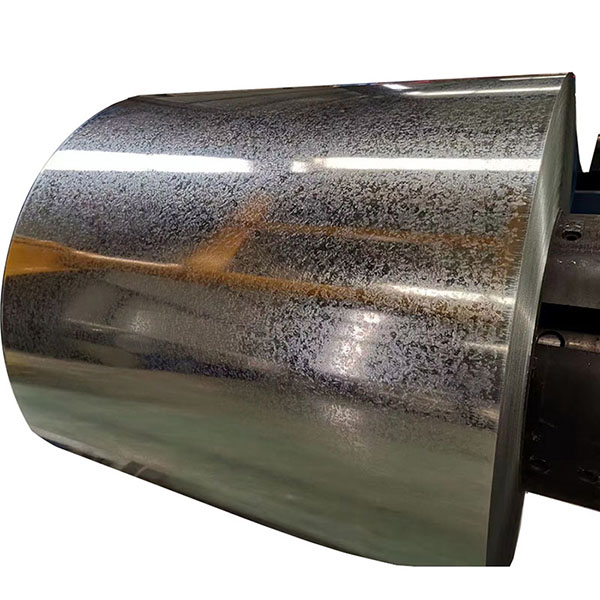
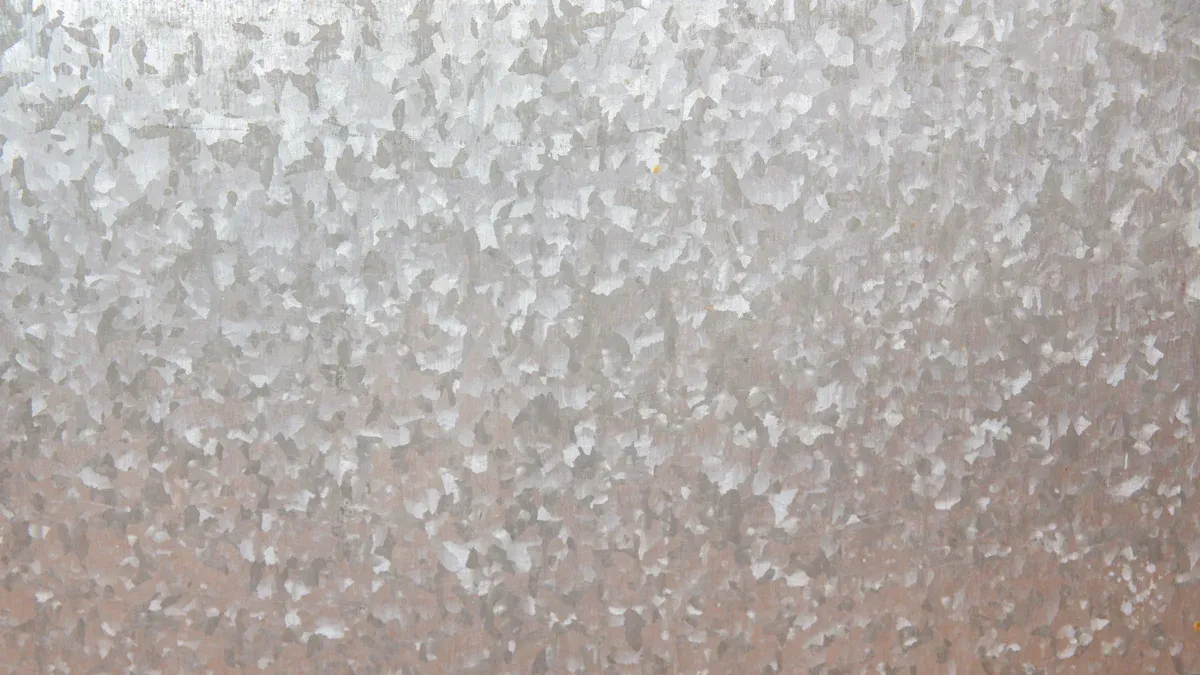
When you begin a visual inspection, focus on the surface color and luster of the steel coils. High-quality galvanized steel coils show a consistent silver-gray or bluish-white color. You should see even brightness across the entire surface. The luster appears soft, without bright or dull spots. This uniformity helps you evaluate surface condition and overall surface quality.
If you notice uneven color, some areas may reveal the base metal. Dull or rough patches often result from zinc slag accumulation. These signs indicate lower quality. Watch for white rust, which looks like a powdery deposit. White rust forms when moisture stays on the surface, leading to oxidation and reduced corrosion resistance. Black streaks or spots can also appear. These marks suggest problems during fabrication, such as insufficient oxidation, and point to poor surface quality.
Tip: Always check steel coil under good lighting to spot subtle changes in color and luster.
Detecting Surface Defects
You need to look for common surface defects during your inspection. These defects affect both appearance and performance. Use your eyes and hands to check for irregularities.
Scratches and Dents
Scratches and dents are easy to spot during visual inspection. Run your hand gently over the coil surface. Scratches appear as thin lines, while dents look like small depressions. Both defects can weaken the protective zinc layer. If you find many scratches or dents, the coil may not provide reliable protection against corrosion.
Rust and Discoloration
Rust and discoloration signal exposure to moisture or poor storage. Rust appears as reddish-brown spots or streaks. Discoloration can range from yellow to black. These issues reduce the coil’s corrosion resistance and surface quality. White rust, a powdery white deposit, is another common problem. It forms when water reacts with the zinc layer, especially if the coil was stored in a damp place.
Note: Surface pretreatment is important. Contaminants like paint or grease can cause leakage plating, leading to visible defects.
Here are some frequent surface defects you might find during visual inspection:
- Missing plating
- Striped feather white pattern
- Over-thick coating
- Roughness
- Grayness
- Tear streaks
- Tortoise cracks
- Crystalline raised lines
- White rust
Flatness and Oil Canning
Surface flatness and defects play a big role in coil quality. You should lay the coil on a flat surface and check for any waviness or unevenness. Flatness means the coil does not have bumps or dips. Oil canning is a visual effect that causes the surface to look wavy or distorted. This effect is common in light-gauge, cold-rolled steel products. The severity of oil canning depends on the color, finish, and viewing angle.
The table below shows standard flatness tolerances for galvanized steel coils:
| Thickness (in.) | Specified Width (in.) | Flatness Tolerances (max. deviation from a horizontal flat surface) (in.) |
|---|---|---|
| 0.05 & Thinner | thru 36 | 3/8 |
| Over 36-60 | 5/8 | |
| Over 60-72 | 7/8 | |
| Over 0.05 | thru 36 | 1/4 |
| Over 36-60 | Over 3/8 | |
| Over 60-72 | 5/8 |
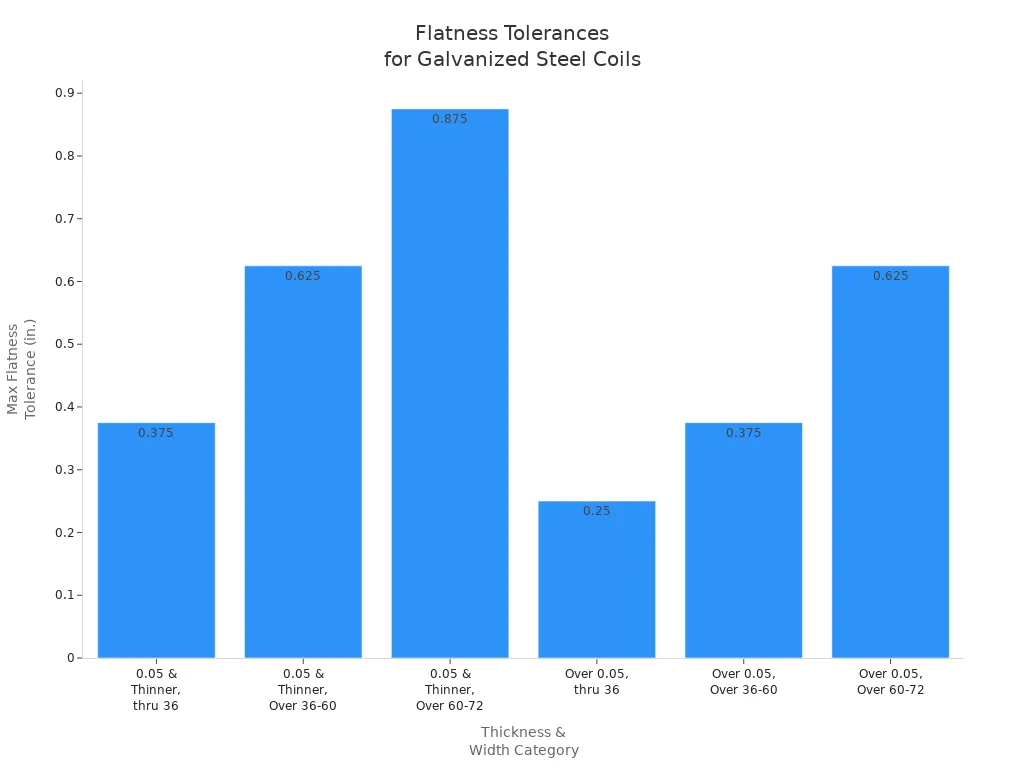
You should compare your coil’s flatness to these standards. If the coil exceeds the tolerance, it may not perform well in further processing or installation. Always include flatness in your inspection checklist to ensure you receive only high-quality coils.
Edge and Mushrooming Issues
You should always inspect the edges of galvanized steel coils. The edge area often shows the first signs of damage or poor processing. Start by looking closely at the coil’s edges. Use your hands to feel for sharpness, roughness, or unevenness. High-quality coils have smooth, even edges without cracks or splits.
Mushrooming happens when the edge of the coil spreads out or flares, making it look wider than the rest of the strip. This defect usually appears after improper rolling or handling. Mushroomed edges can cause problems during further processing. They may lead to jams in machines or uneven cuts.
Here are some common edge defects you might find:
- Burrs: Thin, sharp pieces of metal sticking out from the edge. Burrs can cause injuries or damage to other materials.
- Edge Cracks: Small splits or breaks along the edge. These cracks can grow larger during bending or forming.
- Waviness: The edge does not follow a straight line. Wavy edges make it hard to stack or align coils.
- Mushrooming: The edge flares out, making the coil look like a mushroom cap. This defect signals poor control during rolling.
Tip: Always wear gloves when checking coil edges. Sharp burrs or cracks can cut your hands.
You can use a simple checklist to inspect coil edges:
| Inspection Point | What to Look For | What It Means for Quality |
|---|---|---|
| Smoothness | No roughness or sharp spots | Good processing, safe handling |
| Straightness | Edge follows a straight line | Easy stacking and further use |
| No Cracks or Burrs | No splits or metal slivers | Strong, reliable coil edges |
| No Mushrooming | Edge matches coil width | Proper rolling, no deformation |
If you find edge defects, you should report them right away. Edge problems can lead to waste, machine damage, or safety risks. By checking edges carefully, you help ensure that only high-quality galvanized steel coils move forward in your process.
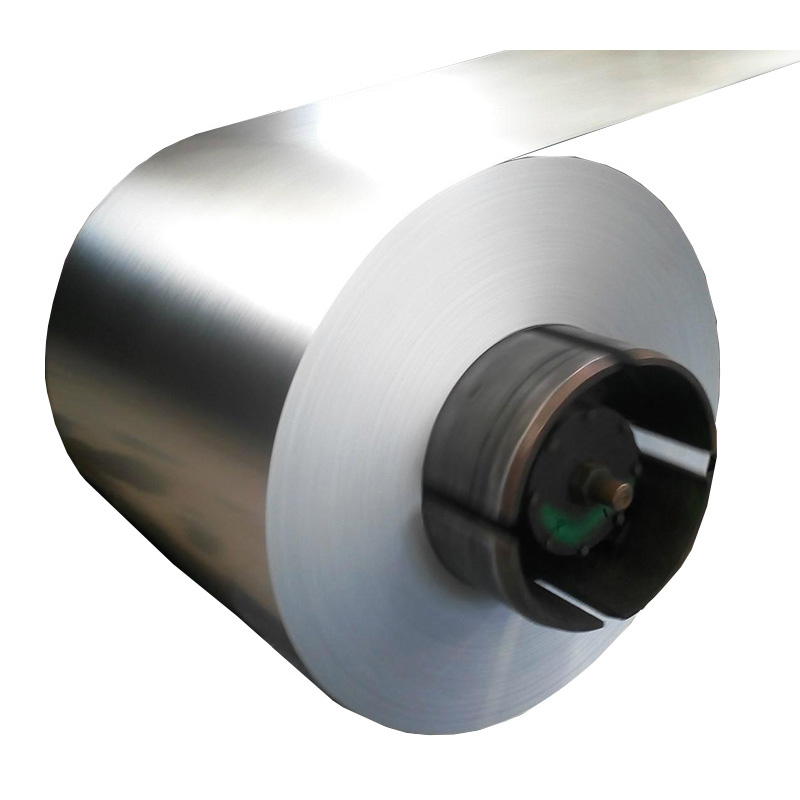
Physical Tests to Check Steel Coil
Physical tests give you hands-on ways to check steel coil for quality. These simple tests of quality verification help you confirm that the steel meets industry standards and will perform well in real-world conditions. You can use these methods to assess surface quality, coating strength, and flexibility.
Zinc Layer Adhesion Test
You need to make sure the zinc layer sticks well to the steel. Poor adhesion can lead to peeling, flaking, or early corrosion. You can use a simple bend test or a tape pull test to check how well the zinc layer bonds to the steel surface.
- For the bend test, take a small strip from the coil and bend it sharply. Watch for any cracks or flakes in the zinc coating. If the coating stays smooth and does not separate, the adhesion is strong.
- The tape pull test involves pressing adhesive tape onto the surface and pulling it off quickly. If you see zinc particles on the tape, the adhesion may be weak.
Industry benchmarks show that the zinc-coating structure affects joint strength and fracture patterns. You may notice that different steel grades show up to 133% variation in shear strength. This happens because the steel composition changes the way the zinc layer forms and sticks. Strong adhesion means better protection and higher overall quality.
Tip: Always perform adhesion tests at room temperature for the most accurate results.
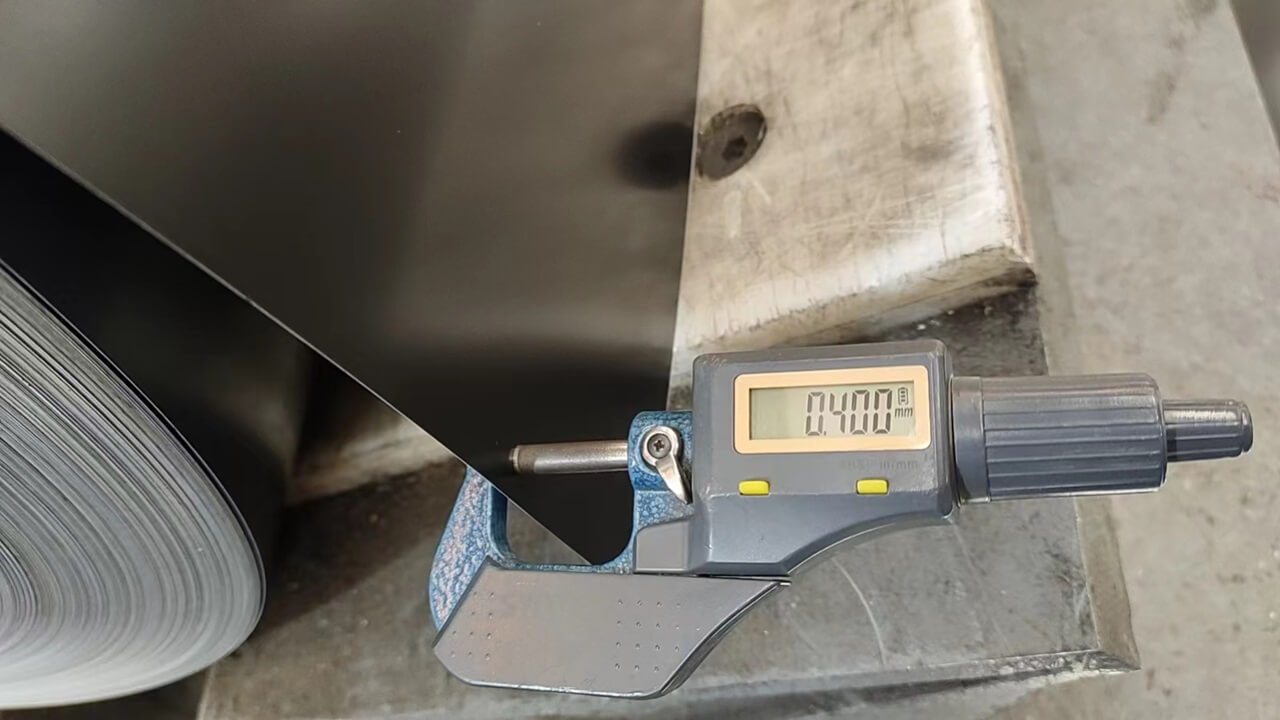
Coating Thickness Measurement
You must measure the thickness of the zinc coating to ensure it meets international standards. A coating that is too thin will not protect the steel from corrosion. A coating that is too thick may crack or peel during bending.
You can use several tools for this task:
- Mechanical galvanizing thickness gauges measure the force needed to pull a magnet from the steel surface.
- Electronic galvanizing thickness gauges use electronic signals to detect changes in magnetic flux.
- Mechanical-pen style gauges work well for small or hard-to-reach spots.
- Mechanical-dial type gauges are simple, durable, and do not need batteries.
- Electronic gauges offer fast readings and can connect to computers for data tracking.
The table below shows the minimum acceptable coating thickness for galvanized steel coils according to international standards:
| Standard | Minimum Coating Thickness (g/m²) | Minimum Coating Thickness (mils) |
|---|---|---|
| EN 10346 | 100-600 | |
| ASTM A653/A653M | 1.8 (<1/16″) / 3.9 (≥1/4″) | |
| Hot Dip Galvanizing | 1.8 (<1/16″) / 3.9 (≥1/4″) |
You should always compare your measurements to these values. If the coating does not meet the minimum, the coil may fail in harsh environments. Regular thickness checks help you maintain high surface quality and prevent costly failures.
Flexibility and Bend Test
You need to check how well the galvanized coating handles bending and shaping. This test shows if the coating will crack or peel during use. You can perform a simple T-bend test by bending a sample strip over itself and looking for cracks.
- Coatings must stretch without breaking. Good coatings can handle a free film strain to failure greater than 200% in a 0T T-bend test.
- Most coatings withstand failure strains of about 3-5% at room temperature. Near the glass transition temperature, they can stretch over 400% before failing.
- The Erichsen cupping test does not give much information about coating failure strain, so focus on bend tests for better results.
If the coating passes the flexibility test, you know the coil will perform well during forming and installation. This step is key for checking overall quality and surface quality.
Note: Always use the same testing techniques for each batch to keep your inspection results consistent.
Physical tests let you check steel coil for quality in a direct way. You can spot weak spots, thin coatings, or poor adhesion before the coils reach your customers. These simple tests of quality verification are essential for anyone who wants to ensure reliable performance and long-lasting protection.
Advanced Inspection Methods
Magnetic Particle Inspection
You can use magnetic particle inspection to find hidden defects in galvanized steel coils. This method helps you check for cracks or breaks that you cannot see on the surface. Here is how you perform this inspection:
- Apply a magnetic field to the surface of the steel using a permanent magnet or an electromagnet.
- Introduce fine magnetic particles, often coated with fluorescent material, onto the surface.
- If there are any defects, the magnetic flux will leak at those points. The particles gather at these spots, making the defects visible under UV light.
This technique lets you spot flaws that might affect the overall quality of the coils. You should use magnetic particle inspection when you need to ensure high surface quality and prevent corrosion from starting at hidden cracks.
Tip: Always clean the steel surface before you start the test. This step helps you get the most accurate results.
Ultrasonic Testing
Ultrasonic testing gives you a way to look inside the steel without cutting or damaging it. You use this method to check for internal defects that could weaken the coil. Here is how ultrasonic testing works:
- Place an ultrasonic probe on the surface of the steel.
- Send high-frequency sound waves into the material.
- Measure the time it takes for the waves to bounce back from inside the coil.
If there are any defects, such as voids or cracks, the sound waves reflect differently. This test helps you find problems that you cannot see from the outside. Ultrasonic testing is very effective for checking the internal structure and quality of steel coils. You should use this method when you need to confirm the coil’s strength and reliability.
Non-Destructive Testing (NDT)
Non-destructive testing includes several advanced testing techniques that help you find hidden defects without harming the steel. Magnetic methods, such as Magnetic Flux Leakage (MFL), work well for detecting internal defects. MFL measures changes in the magnetic field near faults, which shows you where problems exist.
NDT offers many advantages over traditional inspection methods. You can finish your inspection faster and more safely. You do not need to remove or reapply protective coatings, which saves time and money. NDT also helps you keep the steel in good condition while you check for defects.
You should use non-destructive testing when you need to ensure the highest level of quality for your galvanized steel coils. These methods help you catch problems early and avoid costly failures later.
Note: Choose the right NDT method based on the type of defect you want to find and the level of inspection required.
Tensile Testing for Mechanical Quality
Tensile testing gives you a direct way to measure the mechanical quality of galvanized steel coils. This test helps you understand how the steel will perform when you stretch or pull it during use. You can use tensile testing to check three important properties: yield strength, ultimate tensile strength, and elongation.
When you perform a tensile test, you take a small sample from the coil. You place the sample in a machine that pulls it apart at a steady rate. The machine records how much force the steel can handle before it starts to stretch and before it finally breaks. This process shows you the maximum stress the material can endure. It also tells you how much the steel can stretch before it fractures.
- Yield strength tells you the point where the steel starts to bend or stretch without going back to its original shape.
- Ultimate tensile strength shows the highest force the steel can take before breaking.
- Elongation measures how much the steel can stretch as a percentage of its original length.
These numbers are important because they help you decide if the coil will work for your project. For example, if you need steel for a building frame, you want a coil with high yield strength and good elongation. If the steel is too weak, it may bend or break under heavy loads.
Tip: Always compare your test results to industry standards. This step helps you make sure the steel meets the requirements for your application.
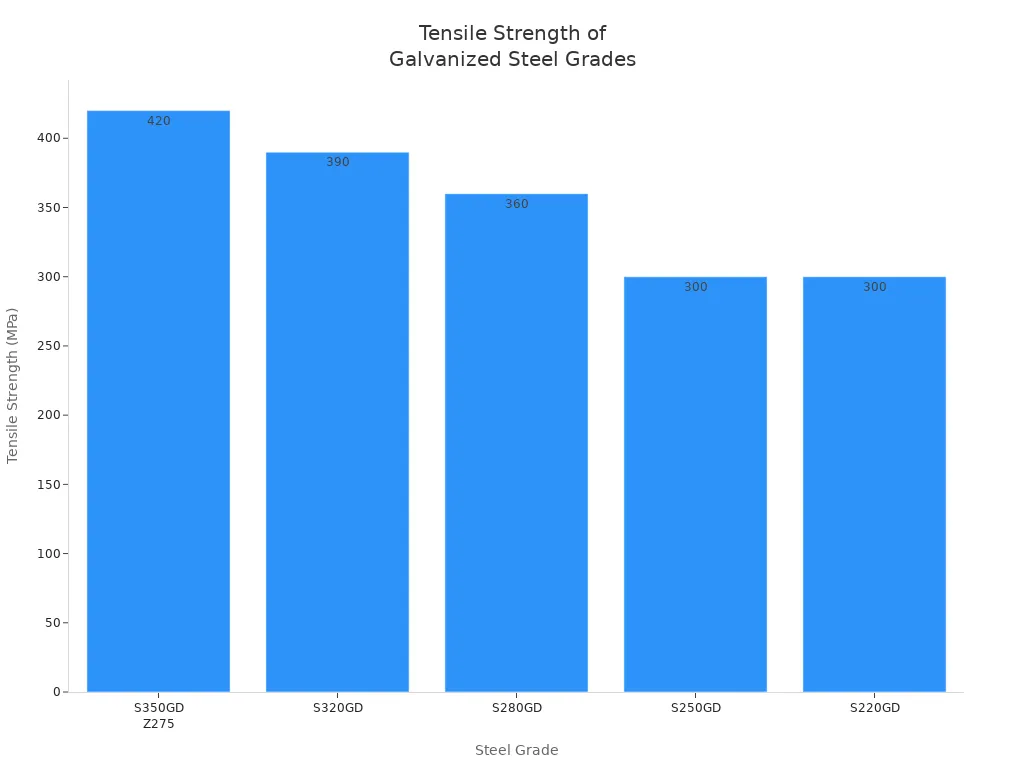
Here is a table that shows typical tensile properties for common galvanized steel coil grades used in construction:
| Grade | Yield Strength (MPa) | Tensile Strength (MPa) | Elongation (%) |
|---|---|---|---|
| S350GD Z275 | 350 | 420 | 16 |
| S320GD | 320 | 390 | 17 |
| S280GD | 280 | 360 | 18 |
| S250GD | 250 | 300 | 19 |
| S220GD | 220 | 300 | 20 |
You can see that higher grades have greater strength but usually lower elongation. This means they are tougher but less flexible. Lower grades stretch more but do not handle as much force.
You should use tensile testing when you need to confirm the steel’s strength for demanding jobs. This test is also useful if you notice any problems during forming or bending. By checking these mechanical properties, you make sure your galvanized steel coils will last and perform as expected.
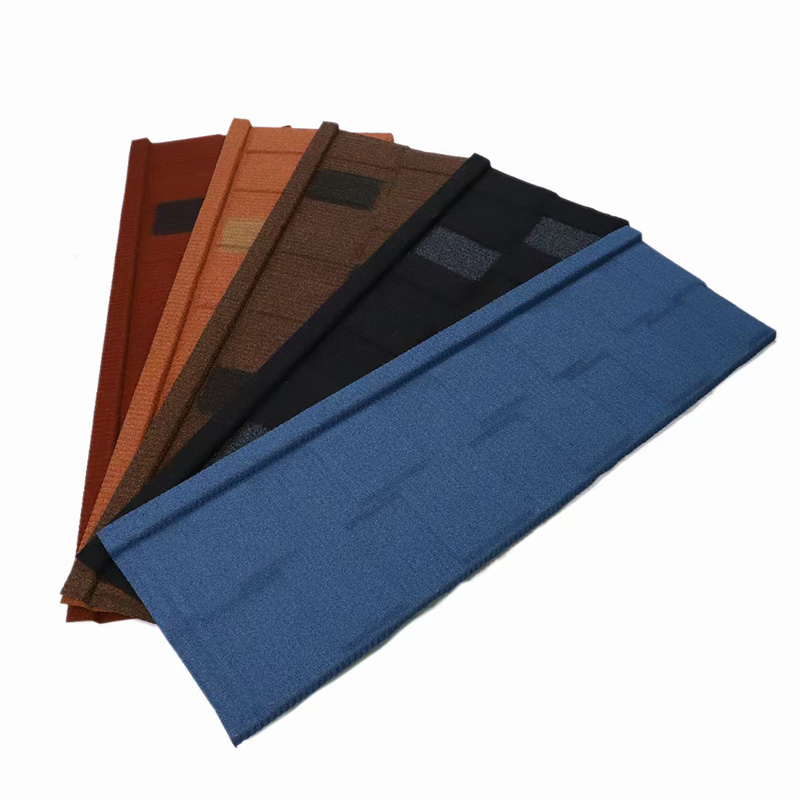
Common Quality Issues in Steel Coils
Surface Defects and Causes
You often find surface defects during inspection. These defects can change how the steel looks and performs. Scratches, dents, and rough patches usually come from poor handling or improper processing. When you see bare spots or missing plating, the coil may not protect against corrosion. Surface cracks and flakes can appear after bending or rolling. These flaws weaken the zinc layer and make the coil less reliable.
Surface defects affect both performance and longevity. The type of coating on the coil changes how long it lasts in harsh environments. Take a look at the table below:
| Coating Type | Benefits | Longevity in Salt Spray Tests |
|---|---|---|
| Zinc Coatings | Sacrificial corrosion protection | 500–600 hours |
| Aluminum-Zinc Coatings | Higher durability and corrosion resistance | Up to 2500 hours |
| PVDF Coatings | High weather resistance and color retention for exterior use | 20–30 years |
If you want high-quality galvanized steel coils, you must check for surface defects. These flaws can shorten the coil’s life and reduce its value.
Coating Problems
You need to watch for coating problems during inspection. Uneven zinc coating, surface roughness, and color variation show up often. Cracks, flakes, and bare spots signal weak adhesion. Edge defects and thick edges can cause issues during forming. Shedding, scratches, and passivation spots also appear in many coils. Sometimes you see zinc particles or air knife streaks. Exposed steel and mechanical damage lower the coil’s protection.
- Uneven zinc coating
- Surface roughness
- Cracks and flakes
- Bare spots
- Adhesion problems
- Color variation
- Edge defects
- Shedding
- Scratches
- Passivation spots
- Zinc particles
- Thick edges
- Air knife streaks
- Exposed steel
- Mechanical damage
Coating problems make the coil less effective against rust. If the zinc layer does not stick well, the coil may fail early. You should use testing techniques like magnetic particle inspection to find hidden flaws in the coating.
Structural and Mechanical Defects
Structural and mechanical defects change how the coil works in industry. You may see waviness, edge cracks, or mushrooming. These defects affect durability, appearance, and cost. The table below shows how these issues impact coil performance:
| Impact Type | Description |
|---|---|
| Durability | Surface defects can lead to premature rust and corrosion, compromising the longevity of the coils. |
| Aesthetic Quality | Defects affect the visual appeal of the material, which is crucial for builders and manufacturers. |
| Cost Implications | Defective materials can lead to higher long-term costs due to maintenance and replacement needs. |
When you find structural defects, you risk higher costs and poor results. You must check steel for these problems before you use it. Testing helps you spot weak spots and avoid failures.
Tip: Always record defects during inspection. This step helps you track quality and improve your process.
Steel Coil Inspection Checklist
Preparation Steps
Before you start to check steel coil for quality, you need to prepare your workspace and tools. Make sure you have gloves, safety glasses, and a clean area. Gather all necessary equipment, such as thickness gauges, tape, and a flashlight. Review the specifications for the steel coil you plan to inspect. You should know the required coating thickness, surface finish, and mechanical properties. Organize your paperwork and inspection forms so you can record results easily.
Tip: Always verify the coil’s identification tags and paperwork before you begin. This step helps you avoid mistakes and ensures you inspect the correct material.
Sequential Inspection Process
You should follow a step-by-step process to check steel coil. This method helps you stay organized and ensures you do not miss any important details. Use the checklist below to guide your inspection:
- Examine the coil’s surface for color, luster, and visible defects.
- Inspect the edges for burrs, cracks, and mushrooming.
- Measure the zinc coating thickness using a gauge.
- Perform adhesion tests, such as the bend test or tape pull test.
- Check for flatness and oil canning by laying the coil on a flat surface.
- Conduct flexibility tests to see if the coating withstands bending.
- Use advanced methods, like ultrasonic testing, if you suspect hidden defects.
- Record all findings and compare them to the specifications.
You should repeat these steps for each coil you receive. Consistency helps you maintain high quality and spot problems early.
Note: If you find any defects, mark the coil and notify your supervisor or supplier right away.
Recording and Reporting Results
You need to document every step of your inspection. Write down measurements, defects, and test results on your inspection form. Take photos of any issues you find. Use a table to organize your data:
| Inspection Point | Result | Comments |
|---|---|---|
| Surface Quality | Pass/Fail | Description of defects |
| Edge Condition | Pass/Fail | Burrs, cracks, etc. |
| Coating Thickness | Value | Meets standard? |
| Adhesion Test | Pass/Fail | Tape/bend results |
| Flatness | Pass/Fail | Oil canning present? |
| Flexibility | Pass/Fail | Cracks or peeling? |
Share your results with your team and supplier. Clear communication helps you resolve issues quickly and improves future shipments. You should keep records for each batch. This practice helps you track quality trends and supports your claims if problems arise.
Tip: Accurate documentation protects your business and ensures you only accept high-quality steel coils.
Tips for Reliable Quality Inspection
Essential Tools and Equipment
You need the right tools to perform a reliable inspection of galvanized steel coils. Start with a good flashlight to spot surface defects. Use a coating thickness gauge to measure the zinc layer. Keep a flexible tape measure for checking coil dimensions. Gloves and safety glasses protect your hands and eyes during handling. A straightedge or ruler helps you check flatness. You should also have a marker or chalk to highlight any defects you find. For advanced testing, keep a magnetic particle tester and an ultrasonic device ready. These tools help you find hidden flaws and confirm the quality of your coils.
| Tool/Equipment | Purpose |
|---|---|
| Flashlight | Surface defect detection |
| Thickness gauge | Zinc coating measurement |
| Tape measure | Dimension checks |
| Gloves & safety glasses | Personal protection |
| Straightedge/ruler | Flatness verification |
| Marker/chalk | Marking defects |
| Magnetic tester | Advanced flaw detection |
| Ultrasonic device | Internal defect testing |
Tip: Always check your equipment before starting. Well-maintained tools give you more accurate results.
Best Practices for Consistency
You can improve your inspection results by following a consistent process. Always inspect coils in a clean, well-lit area. Review the product specifications before you begin. Use the same sequence for each inspection. Start with a visual check, then move to physical tests, and finish with advanced testing if needed. Record your findings right away. Take photos of any defects for your records. Communicate your results with your team and suppliers. This approach helps you maintain high quality and reduces the chance of missing important details.
- Inspect in the same environment each time.
- Follow a step-by-step checklist.
- Document every result.
- Share findings with others involved.
Note: Consistency in your process leads to better quality control and fewer mistakes.
Mistakes to Avoid
You can avoid common errors by staying alert during inspection. Do not rush through the process. Skipping steps often leads to missed defects. Avoid using damaged or uncalibrated tools, as they give false readings. Do not ignore small defects; even minor issues can grow into bigger problems. Failing to document your results makes it hard to track quality over time. Always double-check your work before accepting any steel coils.
| Mistake | How to Prevent It |
|---|---|
| Rushing the inspection | Take your time, follow checklist |
| Using bad equipment | Check and calibrate tools |
| Ignoring small defects | Record and report all issues |
| Poor documentation | Keep detailed records |
Remember: Careful inspection and proper testing help you deliver the best quality to your customers.
You can ensure the best results by following each inspection step carefully. Use both basic checks and advanced tests to spot any issues early. Always record your findings and share them with your supplier. Good communication helps you solve problems quickly. When you follow these guidelines, you accept only galvanized steel coils that meet your quality standards.
FAQ
What is galvanized steel coils?
Galvanized steel coil is steel coated with a layer of zinc. This zinc layer protects the steel from rust and corrosion. You often see it used in construction, appliances, and automotive parts.
How often should you inspect galvanized steel coils?
You should inspect every coil when you receive it. Regular checks during storage and before use help you catch problems early. This practice keeps your projects safe and reliable.
What tools do you need for a basic inspection?
You need a flashlight, gloves, a thickness gauge, and a tape measure. These tools help you check for surface defects, measure coating thickness, and ensure the coil meets your standards.
Can you repair surface defects on galvanized steel coils?
You can fix small scratches or spots with zinc-rich paint. Large defects or deep rust usually require you to reject the coil. Always follow your company’s quality guidelines.
Why does coating thickness matter?
Coating thickness controls how well the coil resists rust. Thin coatings wear out fast. Thick coatings may crack or peel. You should always check that the thickness matches your project’s requirements.
What should you do if you find defects?
Mark the coil and record the defect. Tell your supervisor or supplier right away. Do not use the coil until you get instructions. This step protects your project and your team.
Are advanced tests always necessary?
You do not need advanced tests for every coil. Use them if you suspect hidden defects or if your project has strict quality needs. Basic visual and physical tests work for most inspections.